 Add Row
  Add
Add 

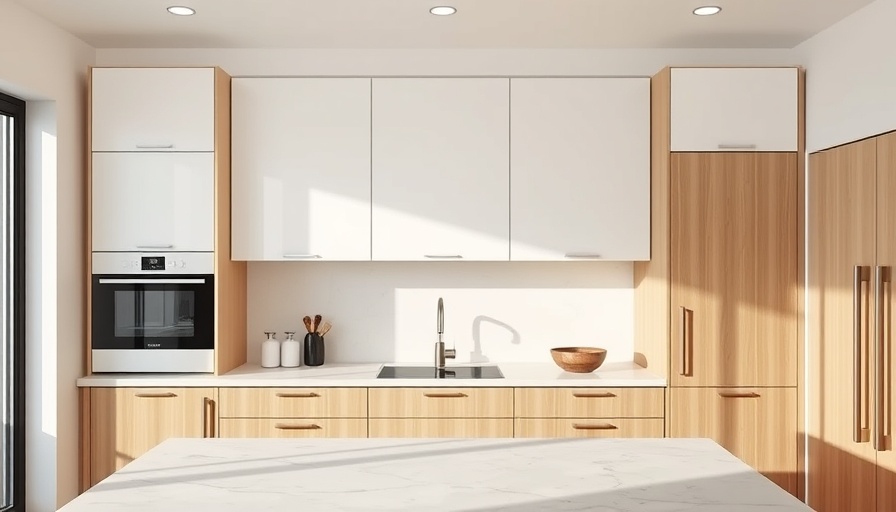
Transform Your Kitchen: A Step-By-Step DIY Guide to Installing Ikea Cabinets
Are you ready to elevate your cooking space without breaking the bank? Installing Ikea kitchen cabinets is an empowering project for homeowners in the MidSouth who value health, wellness, and beautiful living spaces. This comprehensive guide will walk you through the intricacies of cabinet installation, leaving you with not just a functional kitchen, but a warm, inviting atmosphere to cherish.
Why Choose Ikea Cabinets for Your Home?
Ikea cabinets stand out in the remodeling landscape thanks to their innovative design and user-friendly features. Their suspension rail system makes the installation process significantly smoother compared to traditional cabinets. Not only do they offer a modern aesthetic, but these cabinets are also designed for sustainability, aligning with eco-conscious living without compromising on style.
Prior Planning: The Key to a Smoother Install
Planning is pivotal. Before diving into installation, take time to evaluate your kitchen layout, appliances, and potential obstacles. Measure the space you plan to fill and visualize how you want your kitchen to flow. Having a clear vision will help prevent costly mistakes while ensuring your new cabinets fit perfectly within your home’s unique layout.
Essential Tools and Materials for Your Project
Before you begin, gather your tools. A level, assorted drill bits, clamps, a drill, screwdrivers, a square, and a stud finder are essential to a successful installation. Additionally, you'll need specific material like Ikea's cabinets, toekicks, and screws. Having everything on hand not only saves time but can make your DIY project much more enjoyable.
Step-By-Step Installation Breakdown
Follow this detailed step-by-step guide:
- Remove Old Cabinets: Clear out all items from your existing cabinets, then unscrew and carefully detach them from the walls.
- Check for a Level Floor: Identify the highest point on your kitchen floor and draw a level line to ensure all cabinets align correctly during installation.
- Install Base Cabinets: Start by positioning base cabinets according to the planned layout. Ensure that cabinets are secured to both the floor and walls for maximum stability.
- Attach Wall Cabinets: Leverage the suspension rail system to hang wall cabinets, ensuring they sit flush against the wall and are evenly aligned with the base cabinets.
- Add Finishing Touches: Finally, attach cabinet doors, add trim if desired, and secure toekicks to complete the transformation.
Common Challenges and Solutions in Cabinet Installation
While the process may seem straightforward, challenges can arise. Uneven floors and walls can complicate cabinet placement. Use shims to level out your cabinets, and don't hesitate to reach out to online communities for guidance. Remember, each challenge overcome is a step closer to a beautifully designed kitchen!
Embracing Your Newly Transformed Kitchen
With your Ikea kitchen cabinets installed, it’s time to infuse your personal style into your space. Consider adding colorful accessories, plants, and artworks to make the kitchen inviting and reflective of your personality. After all, a home that fosters warmth and creativity promotes not just wellness among spaces, but also among its inhabitants.
Inspired Yet? Take The Next Step!
Are you excited to embark on your kitchen renovation journey? With Ikea cabinets, the process can be enjoyable, budget-friendly, and completely fulfilling. Embrace your creativity and transform your kitchen into a space that caters to both your functional needs and your desire for aesthetic beauty. Start planning your project today!


 Add Row
  Add
Add 
Write A Comment