 Add Row
  Add
Add 

Create a Unique Home with DIY Razor Clam Pendant Light
Looking for a creative way to brighten up your home while embracing sustainable living? Consider crafting your own razor clam pendant light. This unique DIY project not only adds an intriguing design element to your space but also celebrates the beauty of nature.
Understanding the Razor Clam
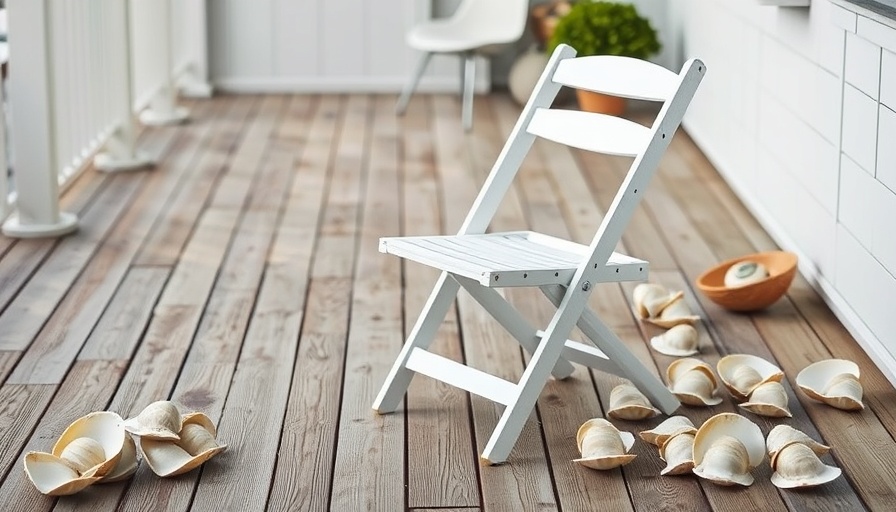
The razor clam, known for its elongated shape resembling old-fashioned razors, offers more than just functional shells. In the MidSouth, where home design often intertwines with local culture and nature, incorporating such unique materials can elevate the aesthetics and emotional connection in your home. As you embark on this project, recall the joy of visiting the coast and gathering shells with family. It’s not just about art; it’s about creating memories.
The Beauty of DIY Projects
DIY projects foster creativity and personal expression. They offer an alternative to generic store-bought decor, allowing your home to reflect your personality and values. Plus, engaging in creative endeavors has been linked to improved mental health and well-being, making this project an excellent choice for those who prioritize holistic living.
Materials Needed for Your Pendant Light
To create your razor clam pendant light, gather the following materials:
- Clean razor clam shells (you can collect these from the beach or buy them from seafood markets).
- A small rotary drill with a diamond-point bit.
- A pendant light fixture.
- Light wire and clippers.
- Scrap board for drilling.
By using elements from nature, you’re participating in sustainable living practices, which is vital for maintaining the health and wellness of your home environment.
Step-by-Step Guide to Create Your Pendant Light
Step 1: Prepare the Razor Clam Shells
To get started, you’ll first need to prepare your razor clam shells. Depending on where you collected them, they may need to be cleaned. Ideally, let them sun dry to achieve a pristine white color. If you’re short on time, a simple bleach scrub will do the trick, ensuring they look fabulous.
Step 2: Drilling the Shells
Using your diamond-point drill, carefully create holes in the shells. It’s important to make sure all shells are oriented the same way to ensure they align perfectly for your pendant light design. Each hole should be random to maintain a natural aesthetic. This step typically takes no longer than ten minutes!
Step 3: Assembling the Pendant Light
Once you’ve prepared your shells, it’s time to assemble them onto the pendant fixture. Use light wire to fasten the shells in your desired configuration, taking care to ensure they hang beautifully and create the soft ambiance you’re aiming for.
Adding Personal Touches
To make your light truly yours, consider adding embellishments, such as colorful wire or additional natural materials like driftwood or beads. This will not only enhance the visual appeal but also create an energy that resonates with your wellness-focused philosophy.
Final Thoughts on Sustainable Living
In a world where mass-produced decor dominates the market, taking the time to create something unique speaks volumes about your values. By crafting a razor clam pendant light, you’re not just improving your home but also fostering a sustainable lifestyle that promises beauty and wellness.
Ready to get started? Gather your materials, embrace the creativity, and transform your space!
 Add Row
  Add
Add 
Write A Comment